How to Burn Videos to DVDs with Lossless Quality on Windows & Mac
Summary: Burning video to DVD is a good way, whether you're interested in safely preserving precious personal moments or easily sharing videos without the need for the internet. This guide will teach you how to burn videos to DVDs with unique DVD menus using free, top-quality DVD creator applications.
Table of Contents
In the age of digital streaming and cloud storage, physical media such as DVDs still hold a unique charm. They offer us tangible control over our cherished memories, favorite movies or significant presentations.
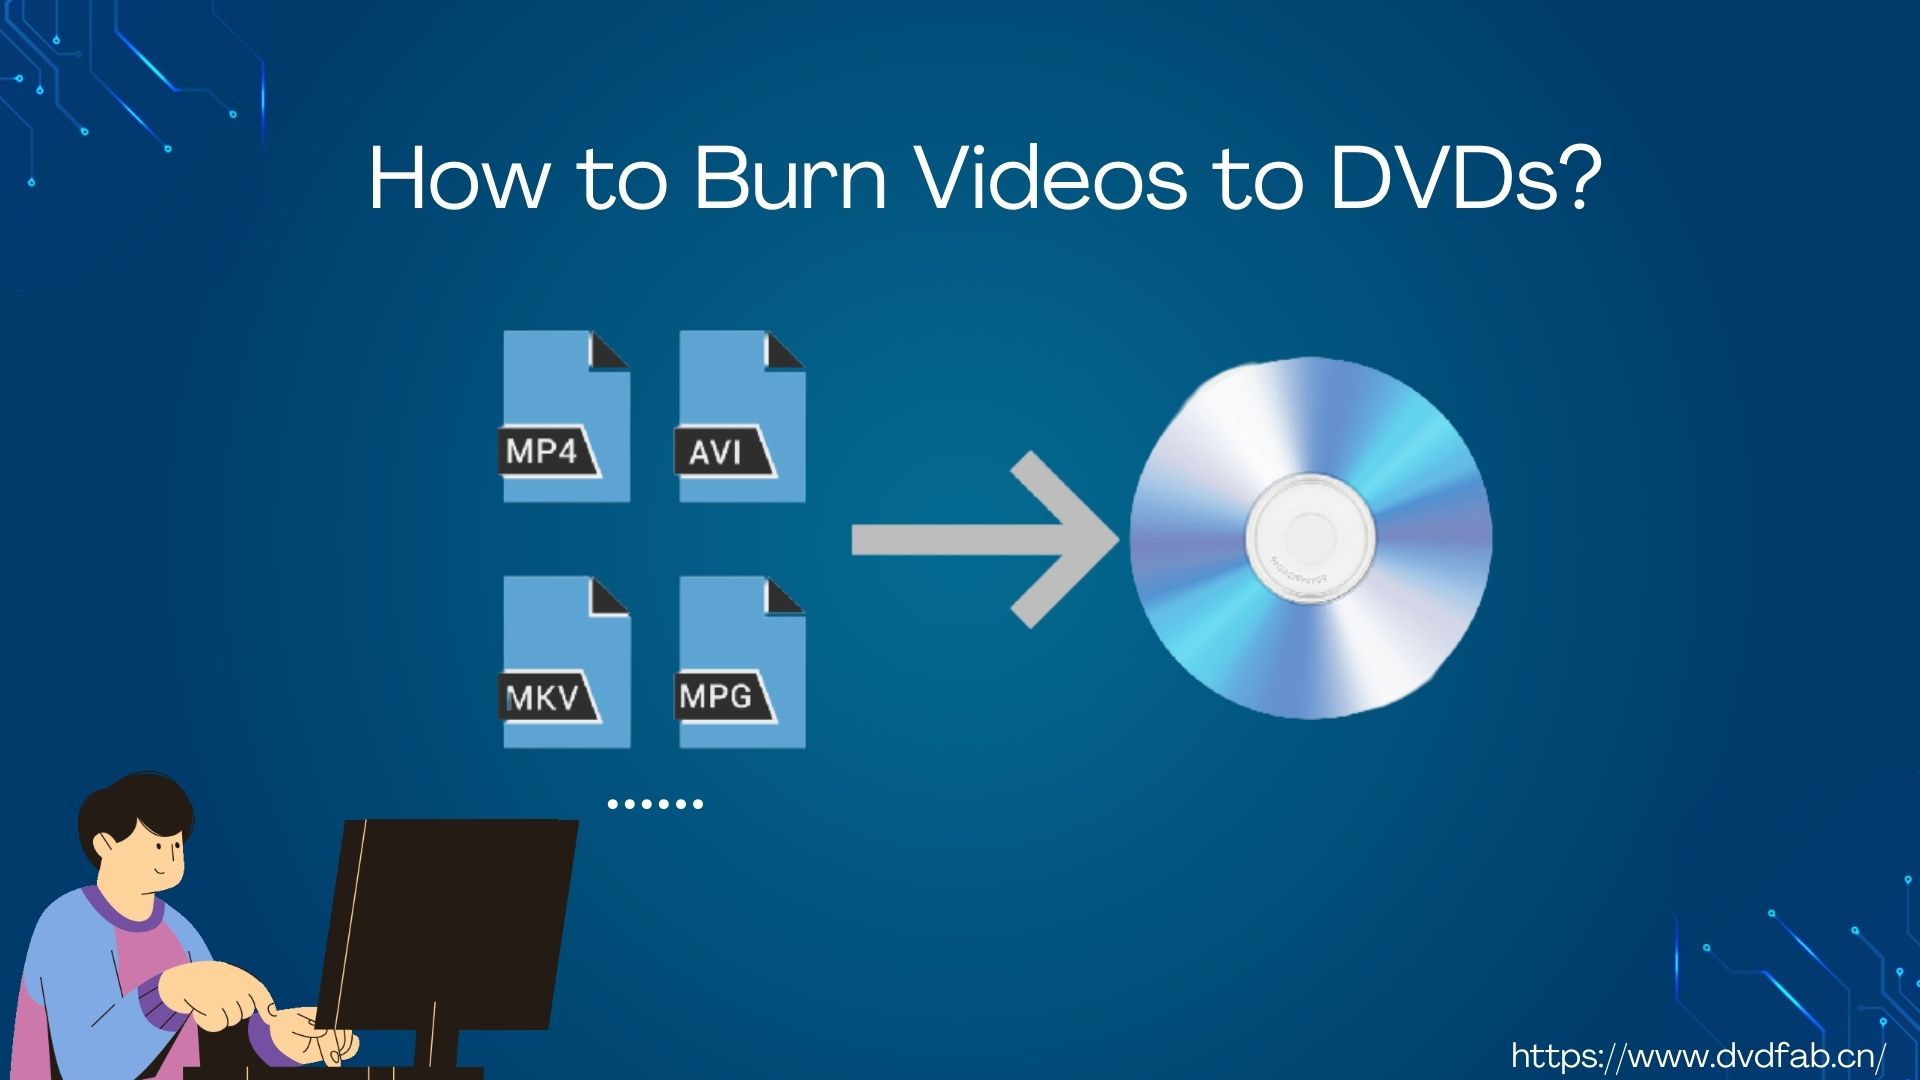
So, burning video to DVD is an essential skill when you want to save your favorite movies or personal videos for future viewing or sharing them with friends. In this article, we'll delve into how to burn your videos to DVDs with the best and free DVD maker.
What to Prepare to Burn Video to DVD?
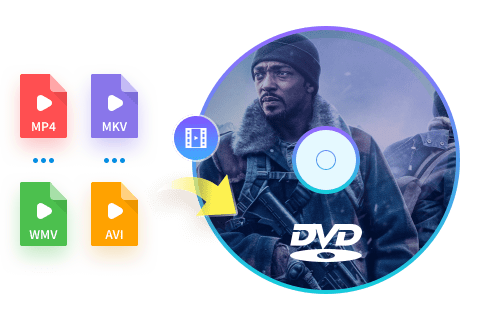
When it comes to burning vide files to a playable DVD, such as burning MKV to DVD, you shall make some preparations in advance. After all, one cannot make bricks without straw.
How to Burn Videos to DVDs with DVDFab (Video DVD)
Best Software to Burn Video to Playable DVD - DVDFab DVD Creator
If you are seeking the best video to DVD burning software, you are in the right place. Here comes DVDFab DVD Creator that enables you to create a playable video DVD disc, ISO file or folder from multiple types of video files with fast speed and premium quality.
DVDFab DVD Creator
💻Available on: Win 11/10/8.1/8/7 & Mac 10.10-14
Features:
- Burn video to DVD/ISO image/Folder from all popular formats, such as MKV, MP4, AVI, M2TS, TS, VOB, MOV, WMV, WMA, 3GP, FLV, M4V, Video_TS, etc.
- Support all DVD disc formats, DVD+R/RW, DVD-R/RW, DVD+R DL, DVD-R DL
- Burn multiple videos to a single DVD and arrange the playback order
- Make and customize DVD menu with professional and stylish templates
- Convert MP4 to DVD with 50 times faster speed (GPU hardware acceleration)
- Output lossless-quality DVD playable on home player or media software
- Synchronize all the meta info of the source video
How to Burn Videos to DVDs with DVDFab DVD Creator?
Now let's start to find out how to burn videos, such as iPhone videos to DVD within 3 simple clicks with stunning quality.
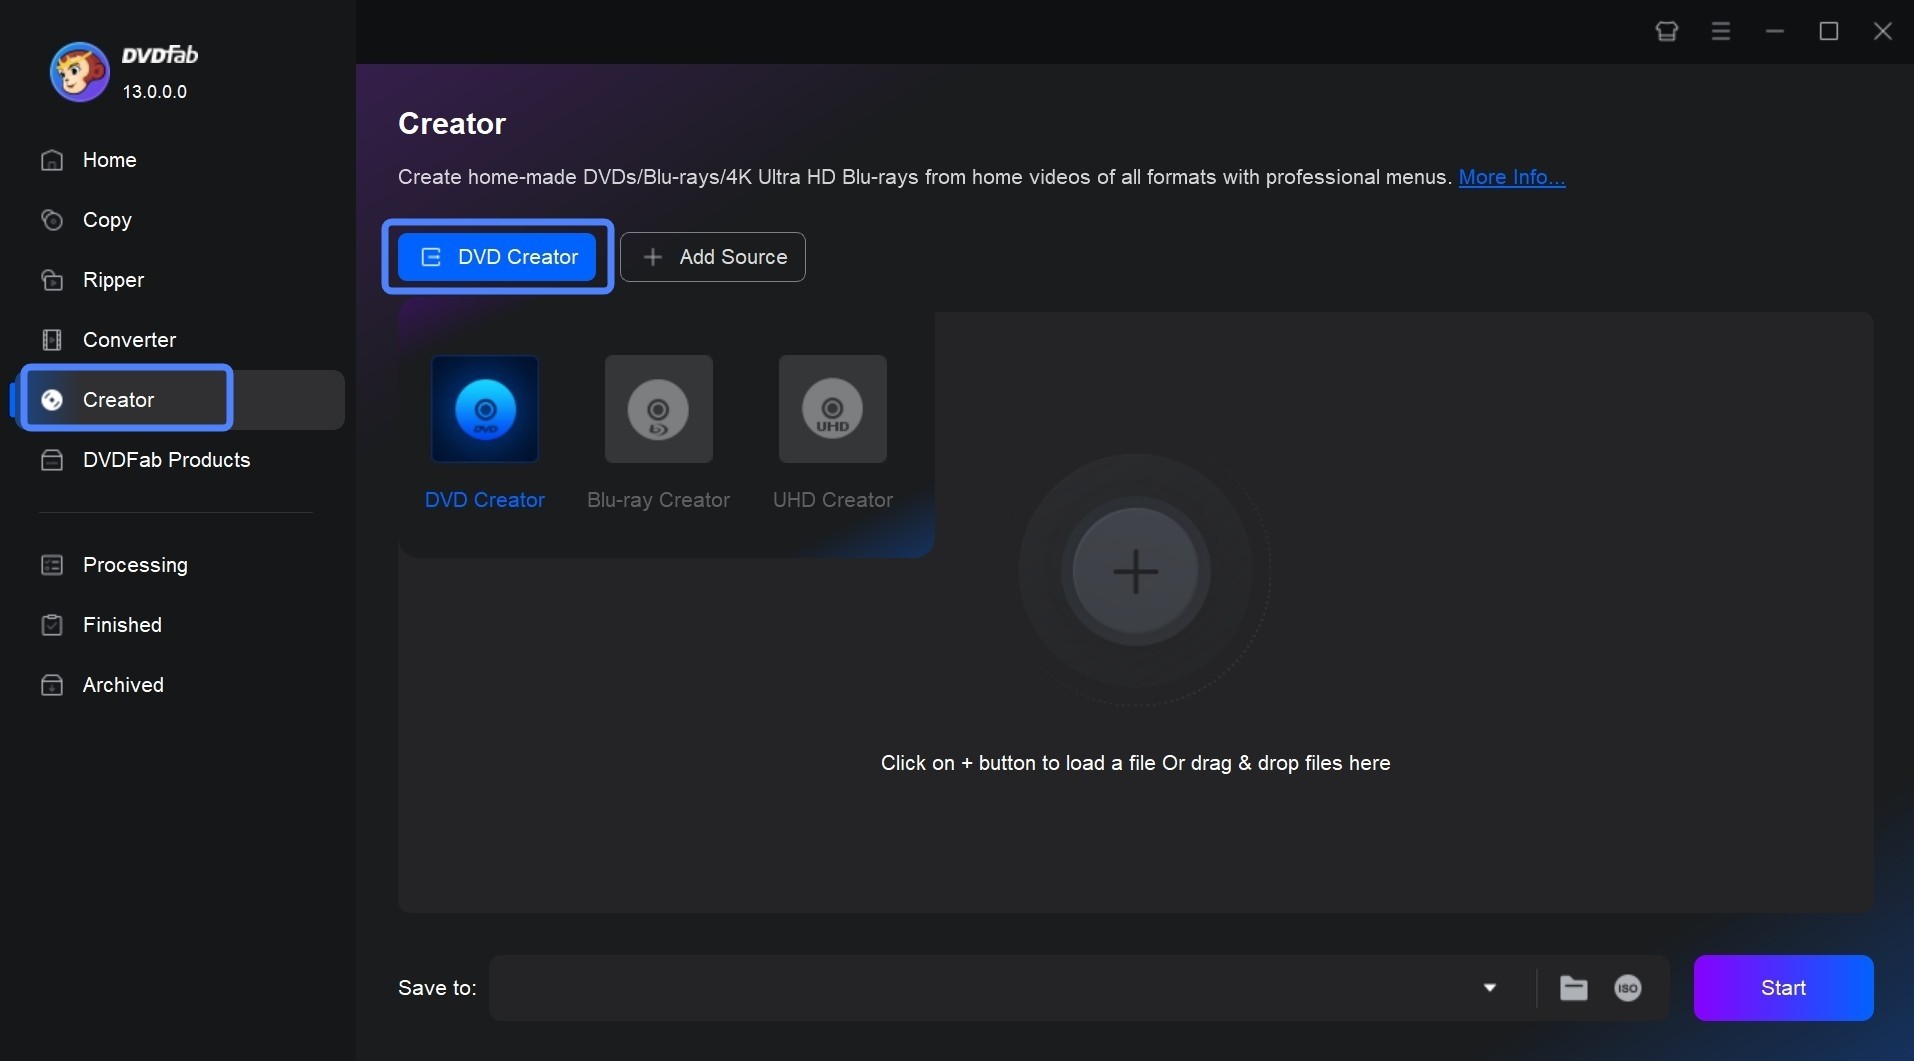
Step 1: Download and launch DVDFab, and load video source
Upon free download and pure installation, move to the left pane to select DVD Creator when the program runs. Load video source or simply drag & drop it onto the main UI.
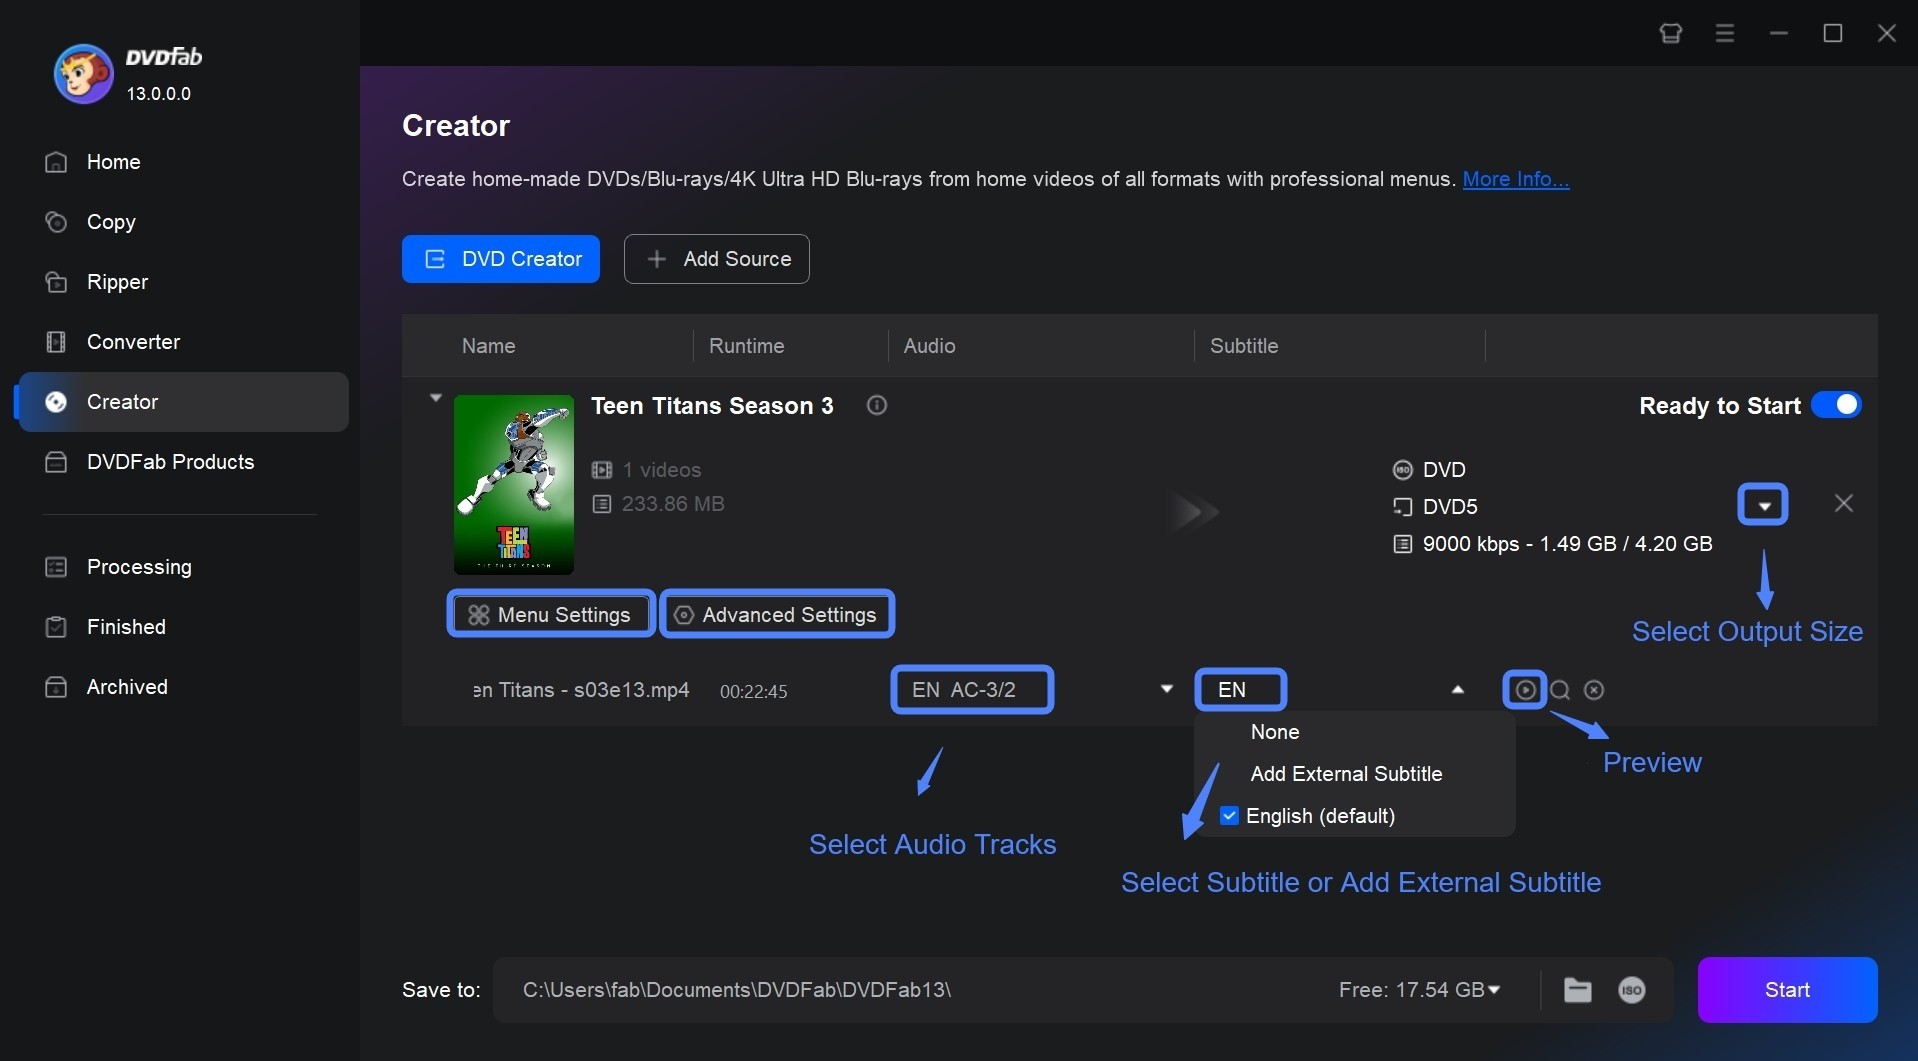
Step 2: Personalize output DVD via Advanced Settings & Menu Setting
Go to "Advanced Settings" to select output DVD size: DVD-9 (8.5G storage capacity) or DVD-5 (4.7G), Menu Properties such as TV Standard (NTSC & PAL) and Aspect Ratio (16:9 & 4:3), and Playback Mode (start from menu or titles). Meanwhile, feel free to add external subtitles to your DVD movie.
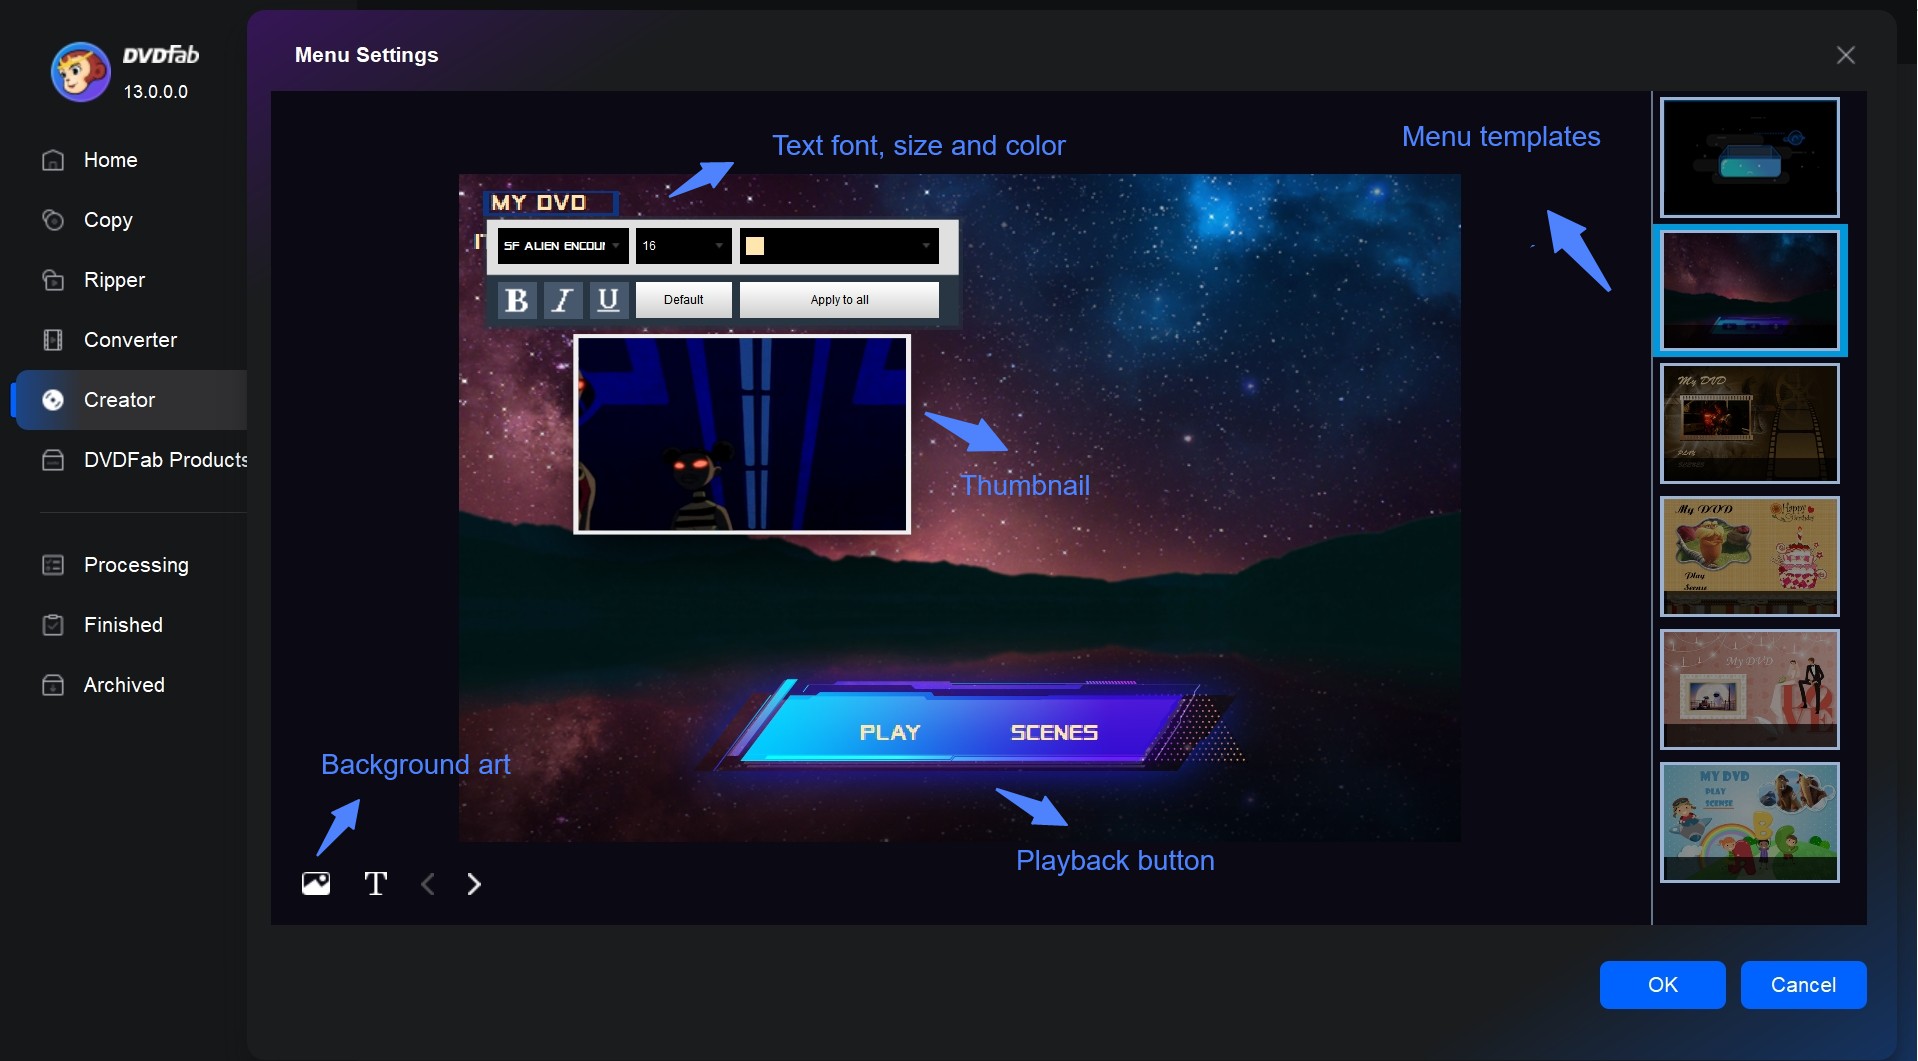
Go to "Menu Setting" to create DVD menu as per personal preference for better playback control. You can also adjust the elements or widgets inside the built-in menu templates, such as adding your own image or text to the menu background, changing text size, font, color of the subtitles of control button. The main menu, buttons, theme selection menu are all under your control.
Step 3: Start to burn video to DVD with Turbo Speed
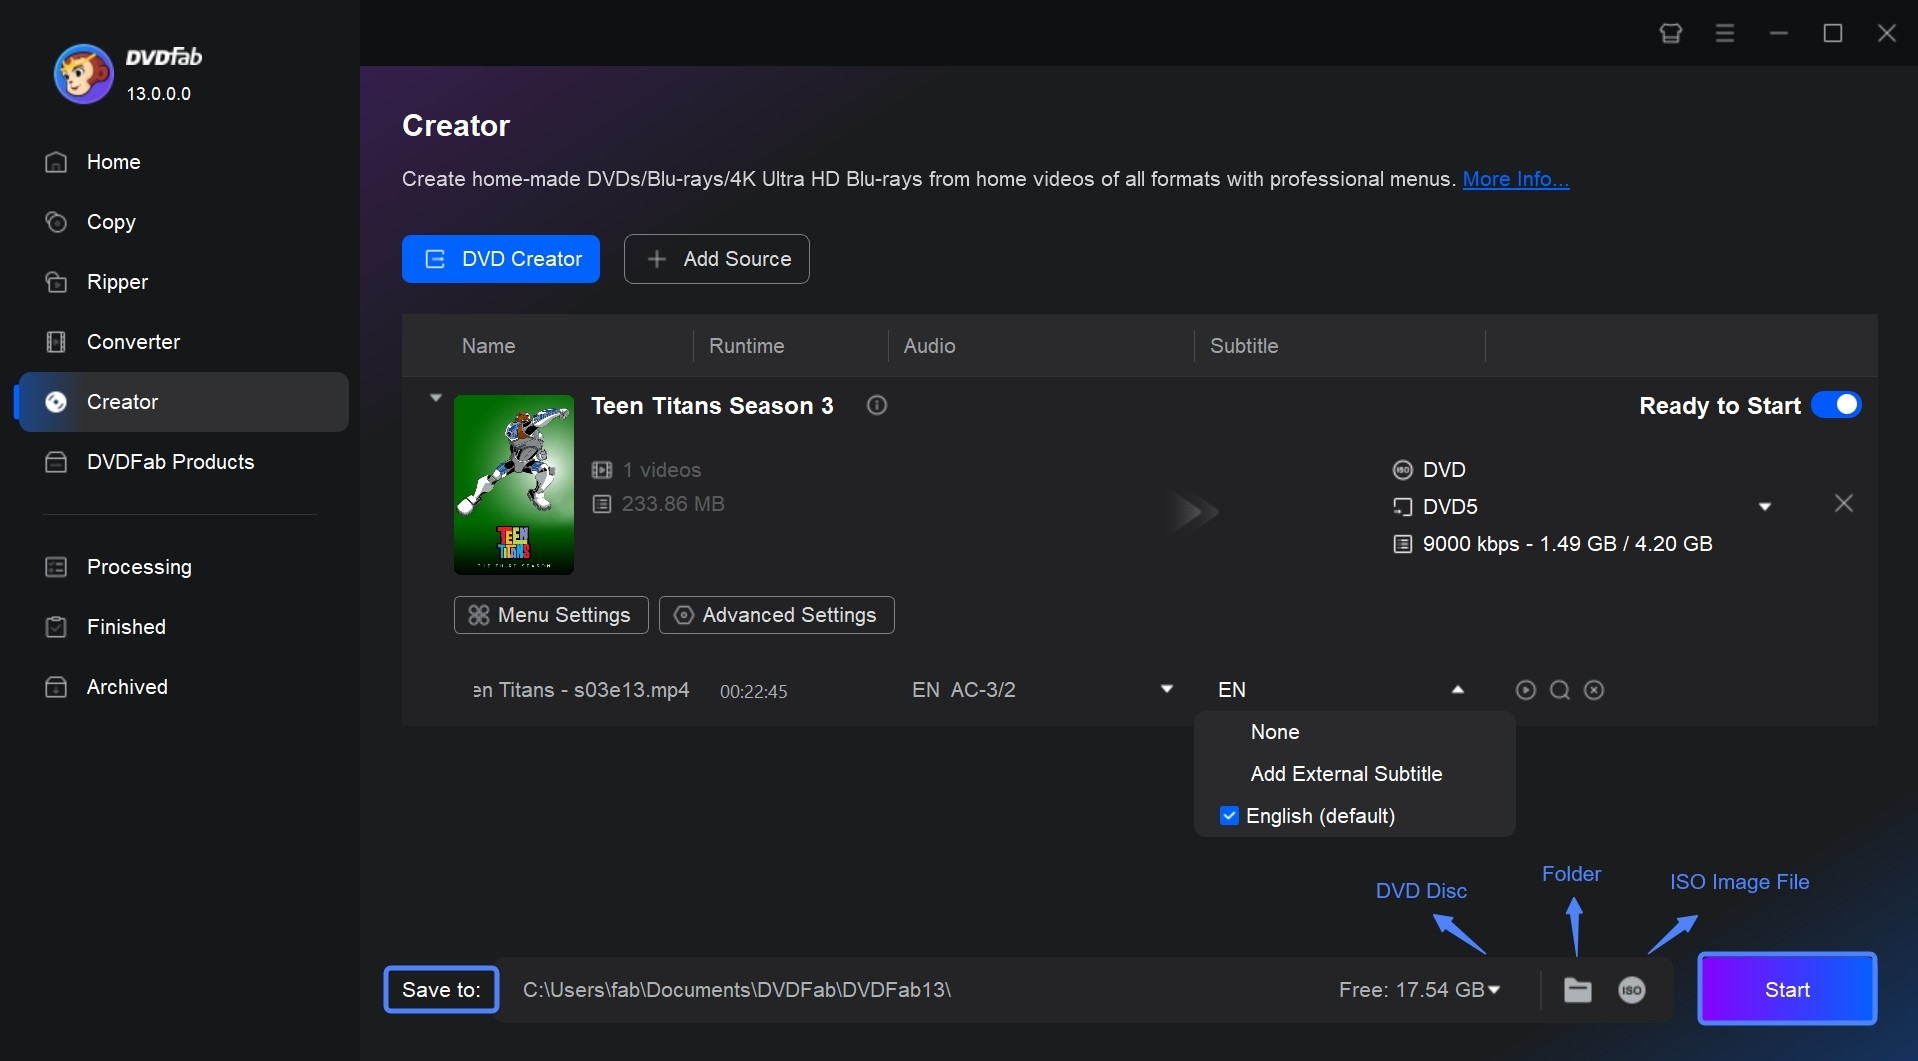
Insert a blank DVD disc into the optical drive of your computer. Alternatively, save the output DVD as ISO file or movie folder if you have no blank DVD disc at hand. Once done, hit the Start button to burn DVD Windows 10 and Mac.
How to Burn Videos to DVDs with Movie Studio (Video DVD)
Magix Movie Studio is a comprehensive tool for video to DVD burning tasks, perfect for personalizing video content. You can burn individual or multiple video files, create movie compilations, and even burn data DVDs. Furthermore, it offers a holistic video editing experience, offering features to enhance videos with effects and templates.
😭However, Magix Movie Studio frequently suffers from unexpected crashes and falls short in providing strong import and organizational tools. Beginners looking to create DVDs from video files may find this program challenging to use, and it doesn't provide sufficient support for more complicated procedures.
💻Available on: Windows 10/11
How to Burn a Video to a DVD using Movie Studio?
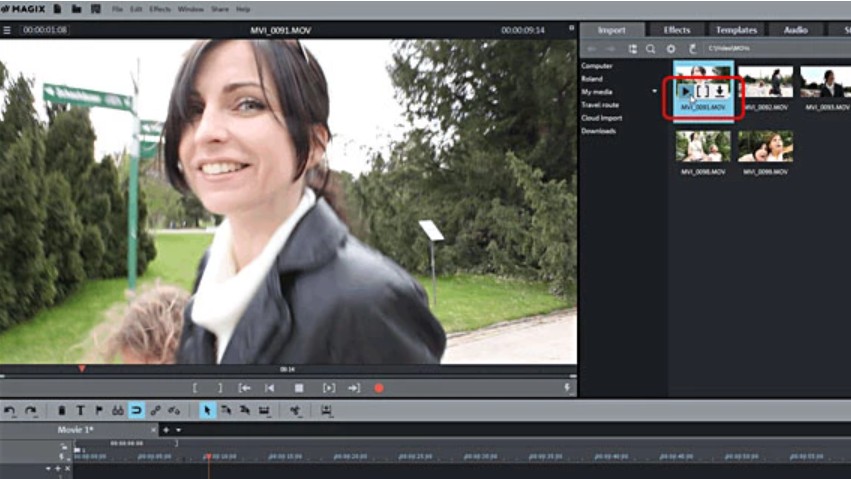
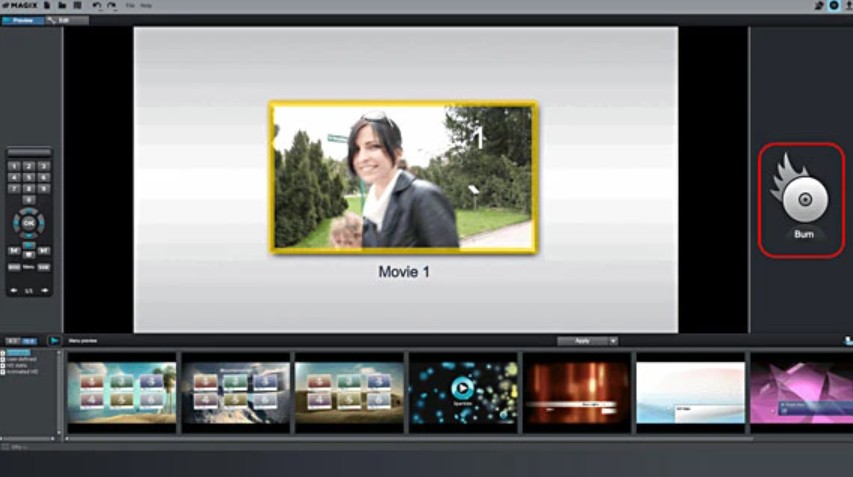
Step 1: Open Movie Studio and locate your video file in the Media Pool.
Step 2: Preview the file by clicking the small arrow, then drag and drop it onto the top track and ensure it starts at the beginning.
Step 3: Switch to the burn interface by clicking on the disc symbol.
Step 4: Click "Burn", select "DVD" as the disc type and place a blank DVD in the drive.
Step 5: Start the burn process by clicking on the "Burn DVD" dialog.
How to Burn Videos to DVDs with AVS Video Converter (Video DVD)
AVS Video Converter is a comprehensive tool that provides an array of multimedia features. Its primary function is video conversion and it supports a wide range of formats. With AVS, you can burn your converted videos directly to a DVD disc in a quick and hassle-free process. It also allows for customization, providing options to edit videos, apply effects and incorporate menus before burning them onto the disc.
😭However, AVS tends to run slowly when burning video to DVD and often has ongoing audio-video syncing issues. Its one-computer, one-install licensing policy lacks flexibility, causing frustration for users unable to transfer or reinstall the software. The company's customer support has been critiqued for being ineffective, particularly concerning licensing issues, and pushes users to buy new licenses.
💻Available on: Windows 11, 10, 8.1, 8, 7, Vista, XP
How to Put Videos on a DVD with AVS Video Converter?
Step 1: Open AVS Video Converter and use the Browse button to select the video file you want to burn.
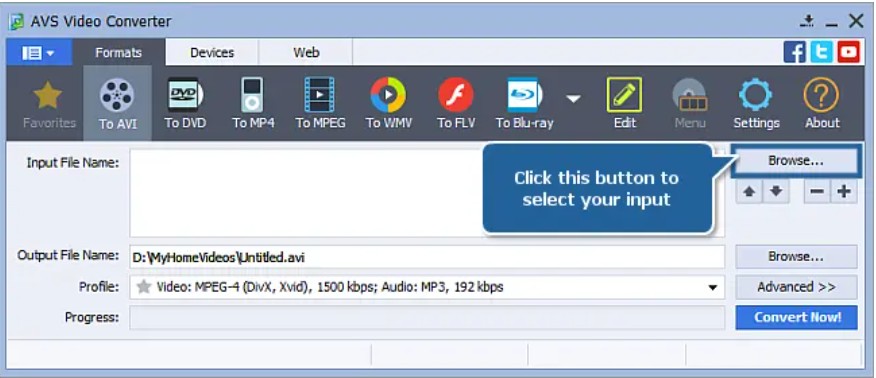
Step 2: Click on 'To DVD' button on the 'Formats' tab, then select a preset profile from the 'Profile' field. You can add, remove, or rearrange files as needed.
Step 3: Click the 'Browse' button next to 'Output File Name' to choose where to save the converted file. Make sure it is saved to your computer's HDD.
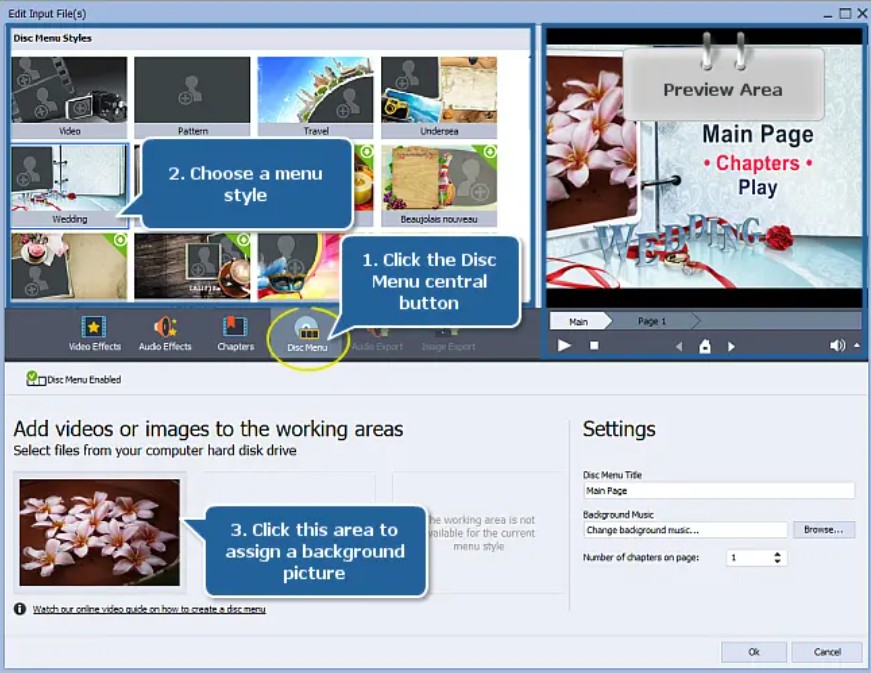
Step 4: Create a DVD menu by setting chapters in the editing mode. You can add or delete chapters as required. Assign desired images or video files as your background.
Step 5: You can change the DVD Menu Title, Background Music or Number of chapters per page in the 'Settings' section. Click 'Ok', then 'Convert Now!' to convert the files.
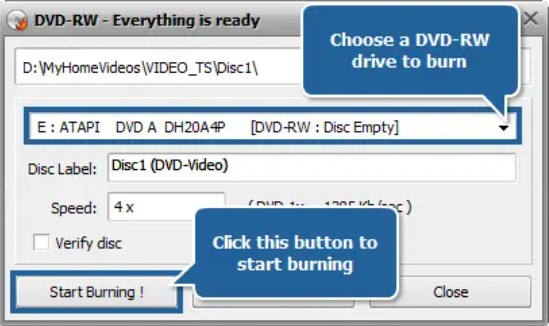
Step 6: After conversion, click on 'Burn to Disc'. Insert a blank DVD compatible with your drive into the disc drive and click 'Start Burning!' to start the recording.
How to Burn Video to DVD with Windows Media Player (Data DVD)
Windows Media Player is a built-in Video to Data DVD software operated by Microsoft. It provides functionality for playing audio, video, and viewing images on computers running the Windows operating system. In addition, this versatile software allows you to burn your desired songs, pictures, or videos onto a CD or DVD, turning them into data discs for playback on appropriate systems. However, you cannot use Windows Media Player to create video DVDs that you could play on a regular DVD player.
💻Available on: Windows 10/8/8.1/7/Vista/XP
How to Burn Video Files to a Data DVD with Windows Media Player?
Step 1: Open Windows Media Player and insert a blank DVD
Launch the program either from the shortcut on your desktop or from the programs list in the Start menu. Then place a blank DVD in your DVD writer drive. Ensure that the drive is either a DVD-R or DVD+R as these are typically the formats that are compatible with Windows Media Player.
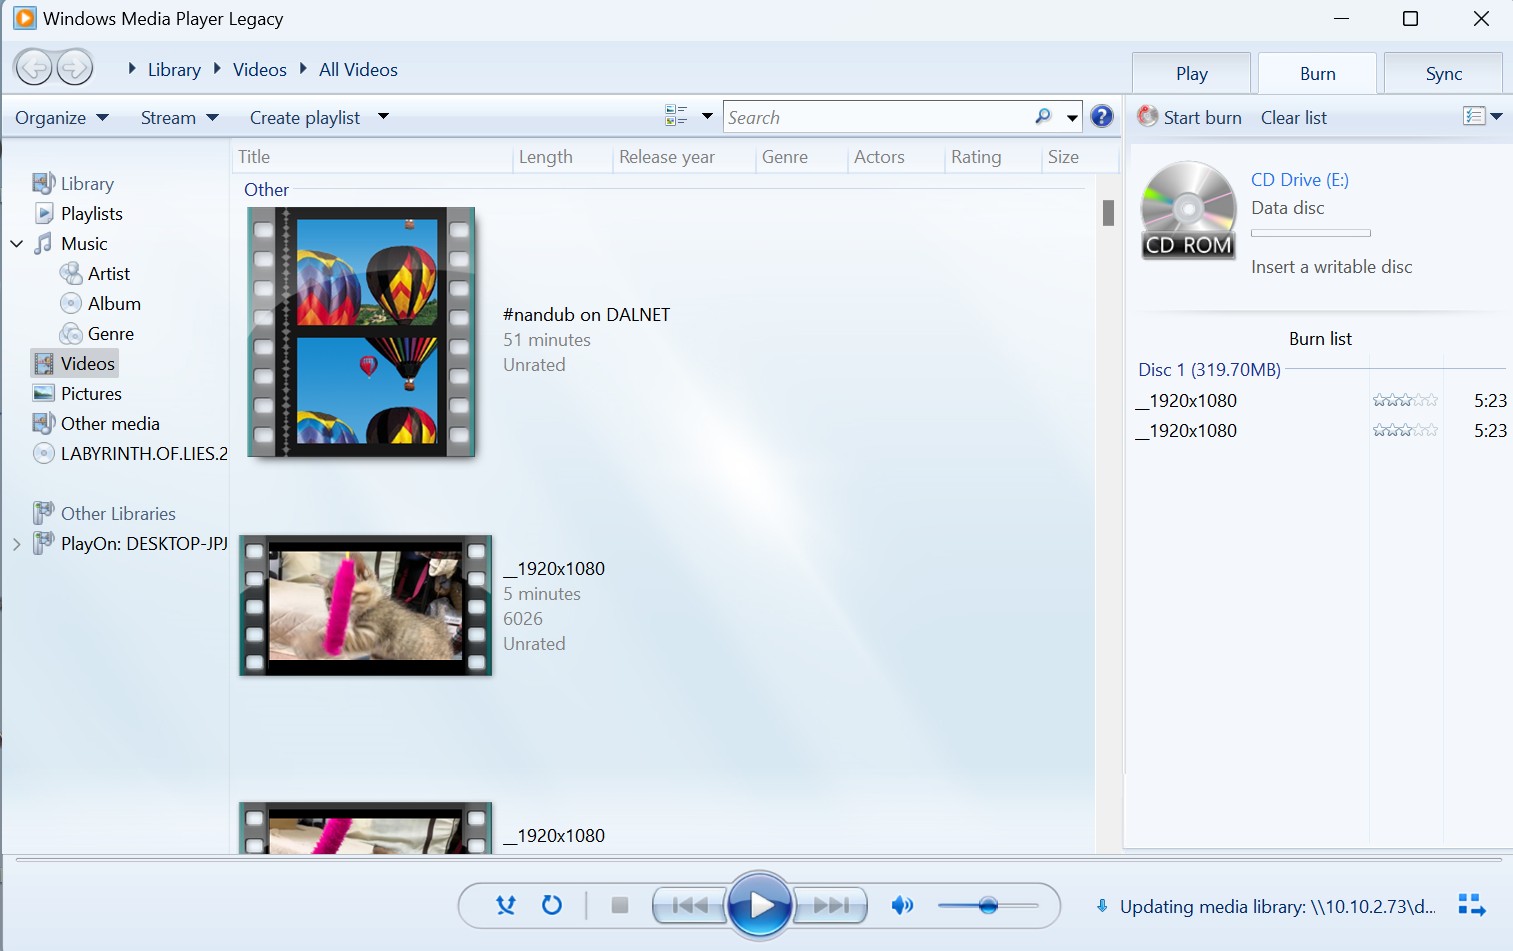
Step 2: Switch to burn list and add files
At the top right of the player, switch from the 'Play' tab to the 'Burn' tab. Navigate through your folders and find the video files you want to burn. Drag them to the burn list in the right pane of the Windows Media Player.
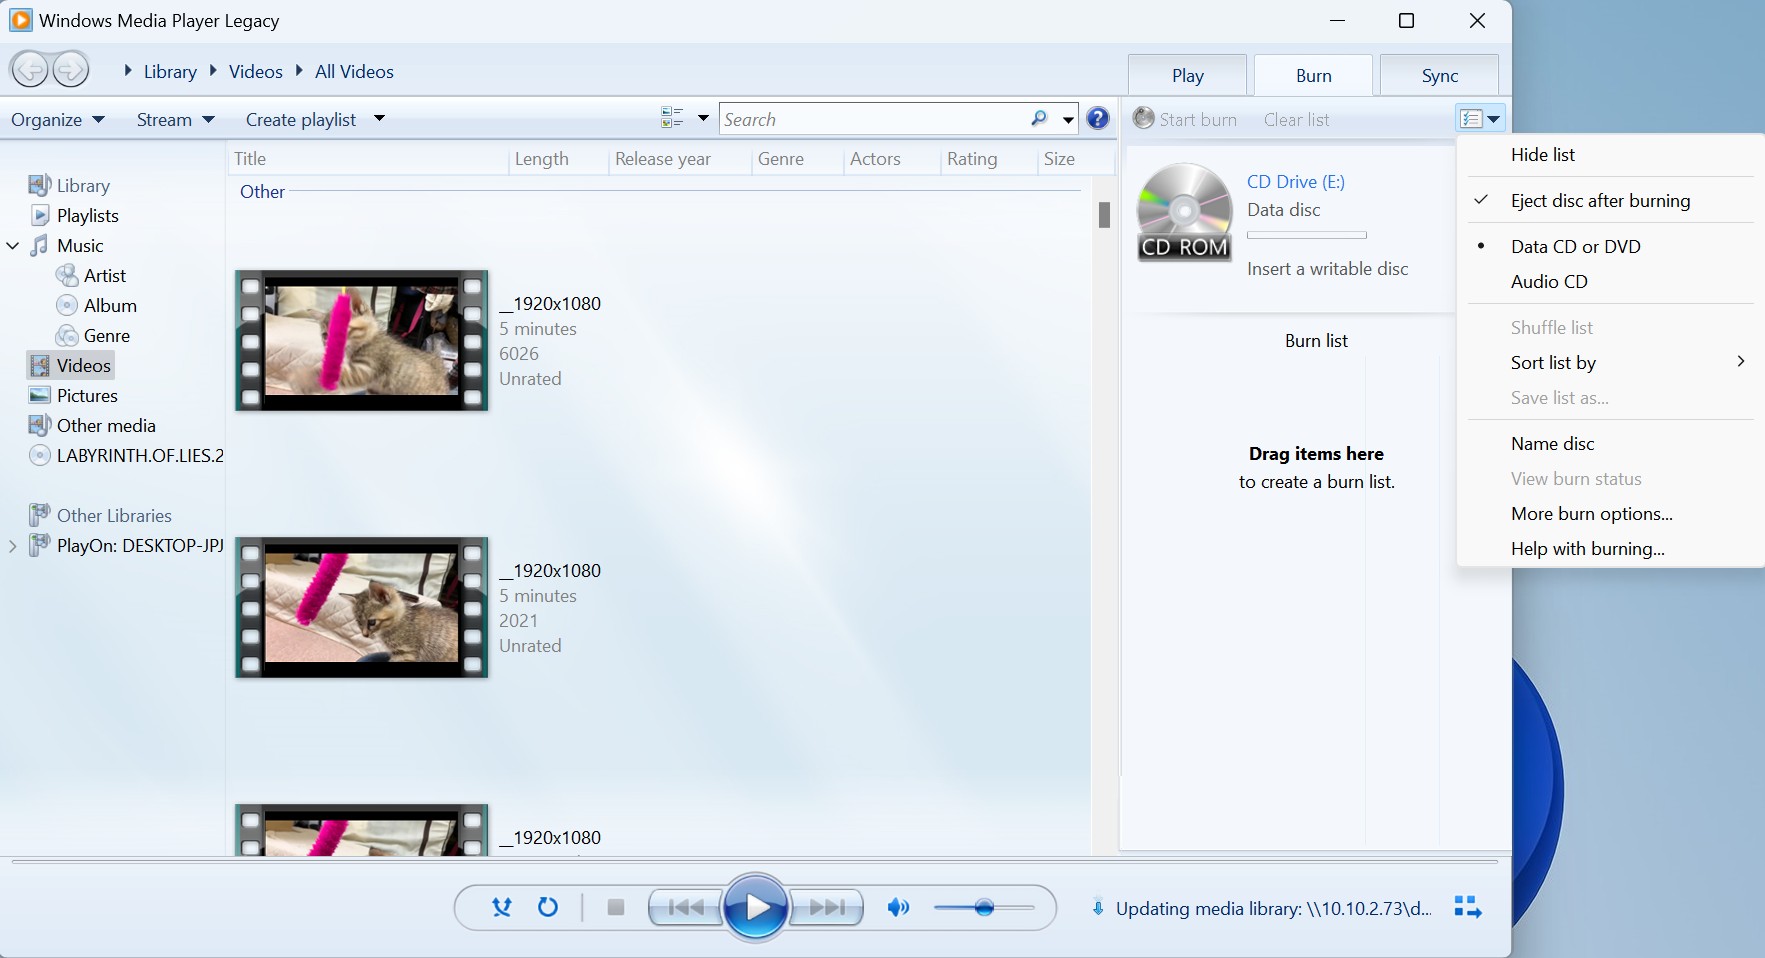
Step 3: Choose the right burning option and start burning video to data DVD
Click on the 'Burn options' drop-down menu and choose 'Data DVD'. Once you're satisfied with your burn list, click on 'Start Burn'. This feature allows Windows Media Player to start writing the video files onto your DVD.
How to Burn a Video to a DVD with Finder (Data DVD)
Finder is the default file manager and graphical user interface shell used on all Macintosh operating systems. Described in layman's terms, Finder facilitates your interaction with your Mac's operating system and files; it helps you organize and access almost everything on your Mac. You can also use Finder to burn your video files to a data DVD, although it does not have features to create a DVD menu or burn a playable video DVD
💻Available on: All macOS versions
How to Burn Video Files to a Data DVD with Finder?
Step 1: Insert a blank or rewritable disc into your Mac's DVD drive and wait for it to appear on your desktop. Double-click on the DVD, and when it opens, go to Finder.
Step 2: Locate the video files that you wish to burn onto the DVD. You can do this by using Finder's search bar or manually searching through your files. Drag the selected files into the open DVD folder.
Step 3: Once you've relocated all the files, click on "File" in the menu bar at the top of the screen.
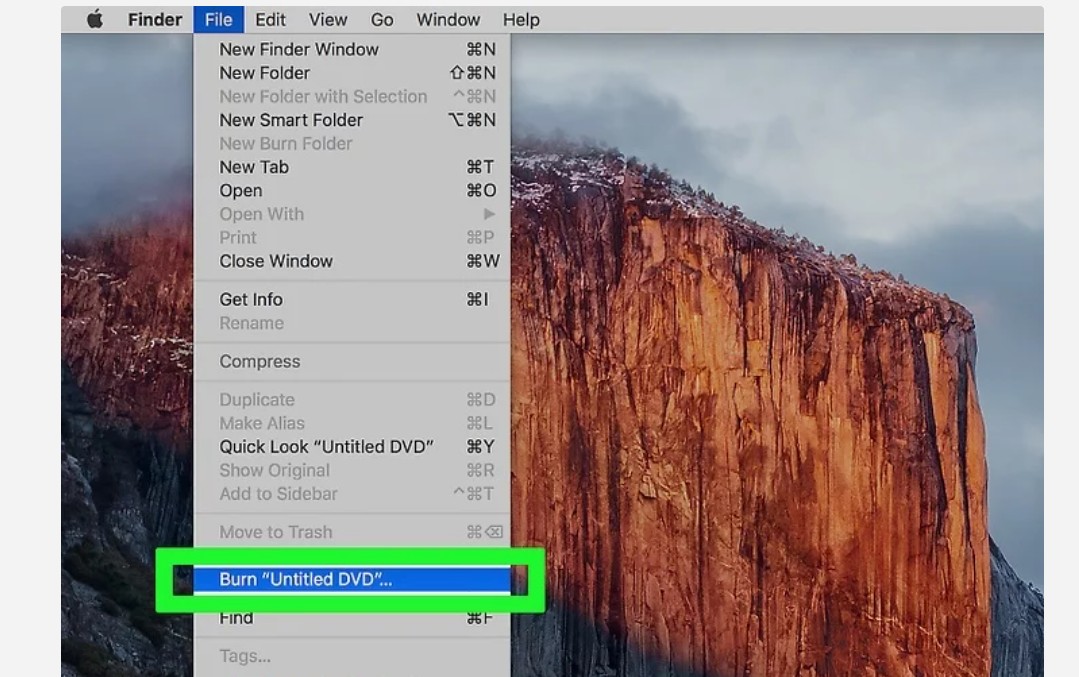
Step 4: Choose the 'Burn [disc]' option to start the burning process. A pop-up window will appear asking you to confirm the action. Click 'Burn'.
FAQs
The following Frequently Asked Questions might be helpful to you when you want to hunt for the best video to DVD burning software.
What type of DVD is best for burning videos?
The type of DVD best for burning videos is a DVDR or DVD+R, as these formats are compatible with the majority of DVD players and computers. These discs typically have a capacity of 4.7GB. If you need to store more data than this, consider using a dual-layer disc such as a DVD+R DL or DVD-R DL, which can store up to 8.5GB.
How to Burn Videos to DVDs with Burn Video App?
- Step 1: Download the free Burn Video app to your smartphone or tablet.
- Step 2: Open the Burn Video app and select the videos you wish to burn to a DVD or USB.
- Step 3: Choose a personalized title for your DVD and send additional titles to family and friends if needed.
- Step 4: Your custom HD DVD and/or USB will be delivered to your door free of charge within a few days.
How to Burn a YouTube Video to DVD?
In order to burn YouTube video to DVD, first, you shall download streaming video with StreamFab, a versatile video downloader that enables you to download your desired videos 1000+ sites with lightning-fast speed and peak quality. Afterwards, import the downloaded video files to the video DVD burner program mentioned above.
How to Burn Netflix Movies to DVD?
- Step 1: Download Netflix movies with the best StreamFab Video Downloader.
- Step 2: Load your download Netflix movies to DVDFab DVD Creator.
- Step 3: Select the output DVD size as DVD-9 or DVD-5 and set the menu properties as NTSC or PAL.
- Step 4: Click "Menu Settings" to create and customize your DVD menu.
- Step 5: Start to burn your Netflix movies to DVD at fast speed.
Conclusion
This post has given you a clear picture of how to burn videos to DVDs free, fast and with lossless quality with DVDFab DVD Creator. Bear the tutorial in mind so that you can get a DVD video disc free with amazing quality. Moreover, this versatile program works as Blu-ray burning software, so you can also use it to transfer your videos on to a Blu-ray disc.
 How to Burn DVD on Mac Free and Easily: 5 Best DVD Burners for Mac
This post aims to offer you some simple, free, and professional solutions to burn DVD on Mac from multiple videos, ISO files, movies, and slideshows with desirable quality and fast speed. Read on to find the best tool suitable for you.
 8 Free DVD Rippers for Windows 10/11: Best Tools & Step-by-Step Guide
How to rip a DVD on Windows 10 so that you can enjoy your favorite movies on your computer or mobile device? This article lists the best DVD rippers for Windows 10/11/8/7 and guides you through the entire process step by step.
 Copy Netflix DVD Rental Movies to PC/Mobile Free & Fast
When people are accustomed to Netflix DVD rental for the latest blockbusters, why not try copying the DVD rental Netflix movies for offline playback both on your PC or mobile whenever you like? This post aims to details the optimal solution to make a quality backup for your favorite movies.
 How to Convert DVD to MP4: 12 Best & Free Methods [2025]
Converting DVD to MP4 lets you enjoy your favorite movies on a tablet, smartphone, or TV. This article reviews the 12 best free converters for 2025, enabling you to back up and rip DVDs to MP4 or other popular digital files with just a few clicks.